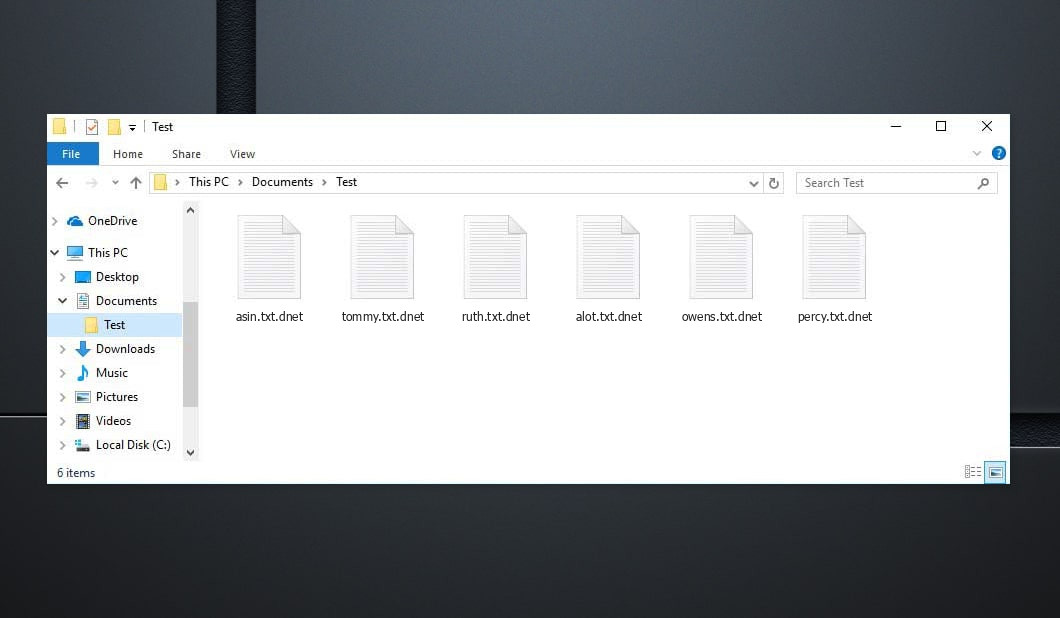
This article intends to help you delete Dnet Ransomware at no cost. Our instruction also explain how any .dnet files can be restored.
Dnet Virus
The Dnet Ransomware represents a PC threat used to blackmail its targets. Dnet Virus may not point to any type of apparent signs, yet its existence is only found as soon as its work is performed.
The lack of signs is among the primary difficulties with this sort of COMPUTER viruses. They can penetrate right into the assaulted system undetected, and implement their job without revealing their task in the workstation. This is why most clients are unable to do anything to end the virus prior to it has actually finished its objective, and the goal of this one, particularly, is to make its victims' documents unusable by means of information ciphering and after that suggesting a ransom money demand.
The user is reported using a message that this infection places on their screen that their only remedy of bringing their data back is through the payment of a specific amount of funds. This blackmailing element of this scam is preferred amongst the fraudulences, as well as there's an entire team of PC malware that's utilized in this manner. This malware group is named Ransomware, and the malware we are presently concentrating on absolutely falls under it.
The Dnet malware is only disclosed once it has completed encrypting the documents. The .dnet Ransomware will certainly then reveal its demands through an intimidating pop-up alert.It is by means of this alert that the individuals discover how they are anticipated to move their funds to the cyber frauds responsible for the Ransomware virus. In the majority of circumstances, the ransom would certainly be asked in a cryptocurrency - BitCoin. These cryptocurrencies are truly difficult to trace, as well as a normal customer would have no chance of knowing who they are really moving their funds to. This, in fact, makes it really unlikely that the cyberpunk's real identity would certainly ever obtain disclosed. It is rather unusual for a Ransomware cyberpunk to stand on trial, as well as the application of cryptocurrency as the recommended repayment solution is the main factor for that.
Listed below you can locate the quote from the Dnet text file:
ATTENTION!

 Don't worry, you can return all your files!
 All your files like photos, databases, documents and other important are encrypted with strongest encryption and unique key.
 The only method of recovering files is to purchase decrypt tool and unique key for you.
 This software will decrypt all your encrypted files.
 What guarantees you have?
 You can send one of your encrypted file from your PC and we decrypt it for free.
 But we can decrypt only 1 file for free. File must not contain valuable information.
 You can get and look video overview decrypt tool:
 https://we.tl/t-2P5WrE5b9f
 Price of private key and decrypt software is $980.
 Discount 50% available if you contact us first 72 hours, that's price for you is $490.
 Please note that you'll never restore your data without payment.
 Check your e-mail "Spam" or "Junk" folder if you don't get answer more than 6 hours.


 To get this software you need write on our e-mail:
 restorealldata@firemail.cc

 Reserve e-mail address to contact us:
 gorentos@bitmessage.ch

 Our Telegram account:
 @datarestore
How to Dnet virus encrypt your files?
The .dnet Infection file file encryption is not going to be removed after the ransomware is removed. The .dnet Virus document encryption access key is promised to be given to you when you pay the ransom amount.
Nonetheless, it is not uncommon for the hackers who guarantee such threats to guarantee their victims a decryption key for their encrypted files just to refuse to supply that vital as soon as the settlement obtains refined. Unnecessary to discuss, if you wind up in a problem like this, you wouldn't can doing anything about it-- your funds would certainly be gone, and your information would certainly still be inaccessible. This is why it isn't really wise idea to move the settlement, moreover, if you haven't chosen any kind of alternative options that might be effective.
Even though we pointed out that the security would continue to be on your papers also after the Ransomware is no longer in the system, deleting the infection is still extremely important. After you eliminate the Ransomware, you might also attempt the different file recovery options we have developed for you, and also your brand-new data won't go to risk of being secured. To remove this cryptoviral danger, you are advised to finish the steps you will certainly come across below.
Dnet SUMMARY:
| Name | .dnet Virus |
| Type | Ransomware |
| Threat Level | High (Ransomware is until now the worst malware you can experience) |
| Symptoms | A Ransomware threat like this one would usually not disclose its visibility up until the documents get secured |
| Promotion Channel | Channels like spam e-mail promotion, and malvertising are normally the ones used to spread Ransomware. |
| Data Recovery Solution | Emsisoft Decrypter |
| Detection Utility |
.dnet may recover itself plenty of times if you don't get rid of its core files. We suggest downloading Loaris Trojan Remover to scan for malicious utilities. This may save you a lot of time and efforts to effectively get rid of all possible malware within your device.
Read more about Loaris Trojan Remover (License Agreement, Privacy Policy ).
If Loaris identifies a threat, you will need to buy a license to get rid of it. |
Delete Dnet Virus Ransomware
Some of the steps will likely demand you to exit the page. Bookmark it to easily get back to it later.
Reboot in Safe Mode (use this tutorial if you don’t know how to do it).
Click CTRL + SHIFT + ESC simultaneously and go to the Processes Tab. Try to identify which processes are malicious.
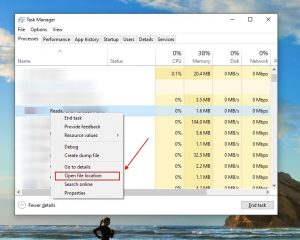
Right click on each of them and choose Open File Location. Then inspect the documents with online file checker:
Once you open their folder, end the processes that are contaminated, then get rid of their folders.
Note:If you are specific something is part of the risk - eliminate it, even if the scanner does not mark it. No anti-virus application can determine all infections.
Keep holding the Win + R. And then copy & paste the following:
- notepad %windir%/system32/Drivers/etc/hosts
A new file will certainly open. In case you are hacked, there will be a lots of various other IPs linked to your device near the bottom. See the picture listed below:
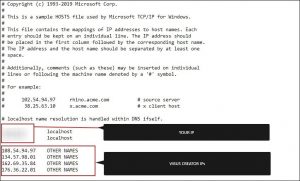
In case there are suspicious IPs below “localhost” – get in touch with us in the comments.
Use CTRL + SHIFT + ESC simultaneously and access the Startup Tab:
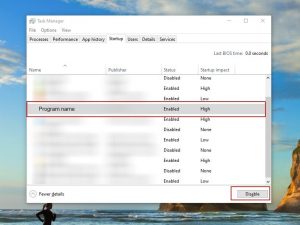
Proceed to Program Name and select “Disable”.
Keep in mind that ransomware may even include a fake developer name to its process. You must check out every process and be persuaded that it is legitimate.
To get rid of Dnet Virus, you may have to deal with system files and registries. Making a mistake and getting rid of the wrong thing may hurt your device.

You can prevent the system damage by selecting Loaris Trojan Remover - a high-quality Dnet removal software.
Read review about Loaris Trojan Remover (License Agreement, Privacy Policy ).
Look for the ransomware in your registries and get rid of the entries. Be very careful – you can destroy your system if you remove entries not associated with the ransomware.
Type each of the following in the Windows Search Field:
- %AppData%
- %LocalAppData%
- %ProgramData%
- %WinDir%
- %Temp%
Get rid of everything in Temp. Finally, simply check out for anything lately added. Don't forget to drop us a comment if you run into any issue!
How to Decrypt .dnet files?
Djvu Ransomware essentially has two versions.
- Old Version: Most older extensions (from “.djvu” up to “.carote”) decryption for most of these versions was previously supported by STOPDecrypter tool in case if infected files with an offline key. That same support has been incorporated into the new Emsisoft Decryptor for these old Djvu variants. The decrypter will only decode your files without submitting file pairs if you have an OFFLINE KEY.
- New Version: The newest extensions released around the end of August 2019 after the ransomware was changed. This includes .coharos, .shariz, .gero, .hese, .xoza, .seto, peta, .moka, .meds, .kvag, .domm, .karl, .nesa, .boot and etc….These new versions were supported only with Emsisoft Decryptor.
"The decrypter can't decrypt my files?"
Most of the times this indicates you have an on-line ID. It can also indicate your documents were encrypted by a newer variant of STOP/Djvu.
- Offline ID. When the ransomware can't attach to its command and also control servers while encrypting your documents, it uses an integrated file encryption key as well as a built-in ID. Offline ID's normally finish in t1 as well as are typically simple to recognize. Given that the offline key and also ID only change with each variant/extension, everybody that has had their files encrypted by the exact same variant will have the very same ID as well as the data will certainly be decryptable by the exact same key (or "exclusive key in the case of RSA security).
- Online ID. For the most part the ransomware has the ability to attach to its command as well as control servers when it encrypts documents, and also when this occurs the web servers respond by generating random keys for each and every infected computer system. Given that each computer system has its very own key, you can't utilize a key from another computer system to decrypt your files. The decrypter can working around this with older versions as long as it has some help, nevertheless for more recent versions there is absolutely nothing that can be done to recuperate files.
In case when the tutorial doesn’t help, download the anti-malware tool we suggest or try free online virus checker. Furthermore, you may always ask us in the comments for assistance!
Leave a Comment