Reasons why INET_E_RESOURCE_NOT_FOUND Error takes place
According to the information on various Internet forums and websites like Reddit, the error message normally pops up, for example, when attempting to open PDF documents, browsing web pages through IE or Microsoft Edge, or even any other browser whatsoever. The people complain that all they encounter is a frustrating alert indicating:
It may be definitely a very distracting factor for you to find out that you cannot load your favorite websites anymore due to the problem in Internet Explorer 11 or Microsoft Edge. In reality, this trouble takes place almost as often as DNS_PROBE_FINISHED_NXDOMAIN issue.
It should be mentioned that in some instances the error takes place and simply gets resolved by itself. Regretfully, if you can’t wait until it is fixed or if it simply keeps annoying you, attempt to undertake the solution set forth below. Our lab has elaborated several solutions to resolve the INET E RESOURCE NOT FOUND DNS error without the need to install any third-party application. Make sure to pay attention to every single step.
Solve INET E RESOURCE NOT FOUND error manually
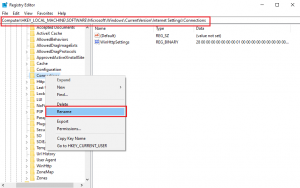
- Go to Windows Registry – keep holding the Windows key + R and then type regedit into the Run prompt, afterwards click OK. At this point, expand folders in the following order – HKEY_LOCAL_MACHINE > Software > Microsoft > Windows > CurrentVersion > Internet Settings > Connections.
- Afterwards, right-click on the Connections folder and change its name to ConnectionsX. Click Enter to apply the changes and save them.
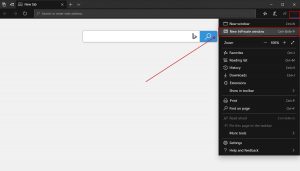
- Start Microsoft Edge. Then, click on the three dots in the right-upper section of the screen. Select New InPrivate window feature.
- Launch Run.. window by hitting down Windows key + R simultaneously.
- At this point, type control and hit Enter (or OK).
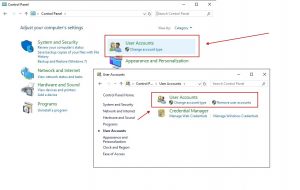
- Select User Accounts, afterwards in the next window, select User Accounts once again.
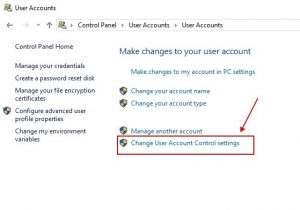
- Here, you need to be convinced that the option you select is the second one when counting from the top. Choose OK to Save. Don’t forget to select Yes to confirm the changes.
- Click on the magnifying glass icon located in the taskbar, and afterwards type cmd in the search bar. Once in the results area, locate Command Prompt. Don’t click on it with the left mouse button – click on it only with the RIGHT button. Then, select the option Run as Administrator. When asked, provide admin’s password.
- In the CMD area, type: ipconfig /flushdns and hit Enter. Note that there is a space before the forward slash (/).
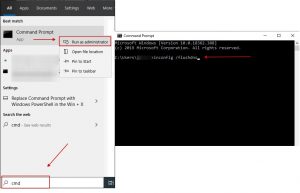
- Once the above-said steps are completed, you will notice “Windows IP Configuration. Successfully flushed the DNS Resolver Cache.” At this point, you can close the Command Prompt window.
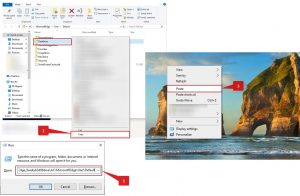
- Start by making a backup of your Favorites. To do so, first start the Run window (press Windows Key and R simultaneously on your keyboard).
- Then, once in the Run window, paste the following bolded information: %LocalAppData%\Packages\Microsoft.MicrosoftEdge_8wekyb3d8bbwe\AC\MicrosoftEdge\User\Default
- Afterwards, press Enter or choose OK.
- Eventually, folder with some other folders comes up. Locate the one named DataStore, then right-click on it and choose Copy from the menu.
- Then, open any folder you prefer (select one where you can easily locate the file later, for example, Desktop) and then right-click with your mouse > Paste it.
- Then, close Microsoft Edge fully. Make sure there are no any Microsoft Edge windows open.
- Afterwards, click on File Explorer (in the taskbar) and choose the View tab. At this point, place a tick in the checkbox of the Hidden items by making a click on it.
- Then, copy the following information – C:\Users\YourUserNameHere\AppData\Local\Packages and provide it in the File Explorer’s Quick Access bar, but before you press Enter to access the path, replace the YourUserNameHere section with your computer’s username.
- Then, locate a folder named Microsoft.MicrosoftEdge_8wekyb3d8bbwe. Right-click on it and choose Delete from the menu. Confirm your selection by clicking on Yes. If the system refuses to get rid of some files, simply click on Skip several times.
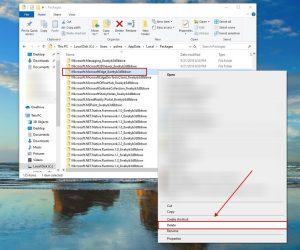
- As soon as the files are removed, reboot your PC. Wait until it fully loads before implementing the next milestone.
- Afterwards, look for the magnifying glass icon, then click on it to open search, and type powershell. As soon as the WindowsPowershell comes up in the search results, hover the computer mouse over it, right-click on it, then choose Run as Administrator.
- As soon as the Powershell launches, type in: cd C:\ and press Enter. Then, type cd C:\users\YourUserNameHere (again, provide your real computer username in this section) and hit Enter. Then, copy the following lines and provide them in the Powershell window:
Get-AppXPackage -AllUsers -Name Microsoft.MicrosoftEdge | Foreach {Add-AppxPackage -DisableDevelopmentMode -Register “$($_.InstallLocation)\\AppXManifest.xml” -Verbose}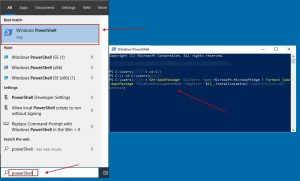
- Hit Enter and wait until the process is over. Once completed, reboot your device. The INET_E_RESOURCE_NOT_FOUND trouble should be now resolved.
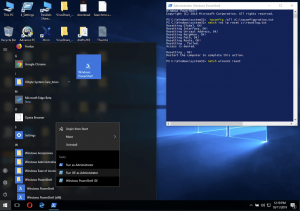
- Right-click on Windows icon in the taskbar and select Windows PowerShell (Admin). Select Yes to apply the changes.
- In the Powershell, provide the below-said command: ipconfig /all > C:\ipconfiguration.txt . This will save your present IP settings.
- Then, copy and paste the below-mentioned command: netsh int ip reset c:\resetlog.txt and hit Enter;
- Afterwards, copy and paste this information: netsh winsock reset and hit Enter;
- Reboot your computer.

Leave a Comment